You could be a businessman, a student, or anything else. Every day, you require a simple calculator. Although Excel itself is a complete calculator, we can create a basic calculator capable of doing addition or subtraction like basic operations in Excel. In this article, we’ll demonstrate four easy and quick steps to create a calculator using macros in Excel. So, let’s go through the entire article to understand the topic properly.
How to Create a Calculator Using Macros in Excel (with Easy Steps)
In the following article, we’ll exhibit four easy and practically detailed steps to create a calculator using macros in Excel. With this calculator, you can easily do multiple operations like addition, subtraction, multiplication, and division. See a demo in the following GIF.
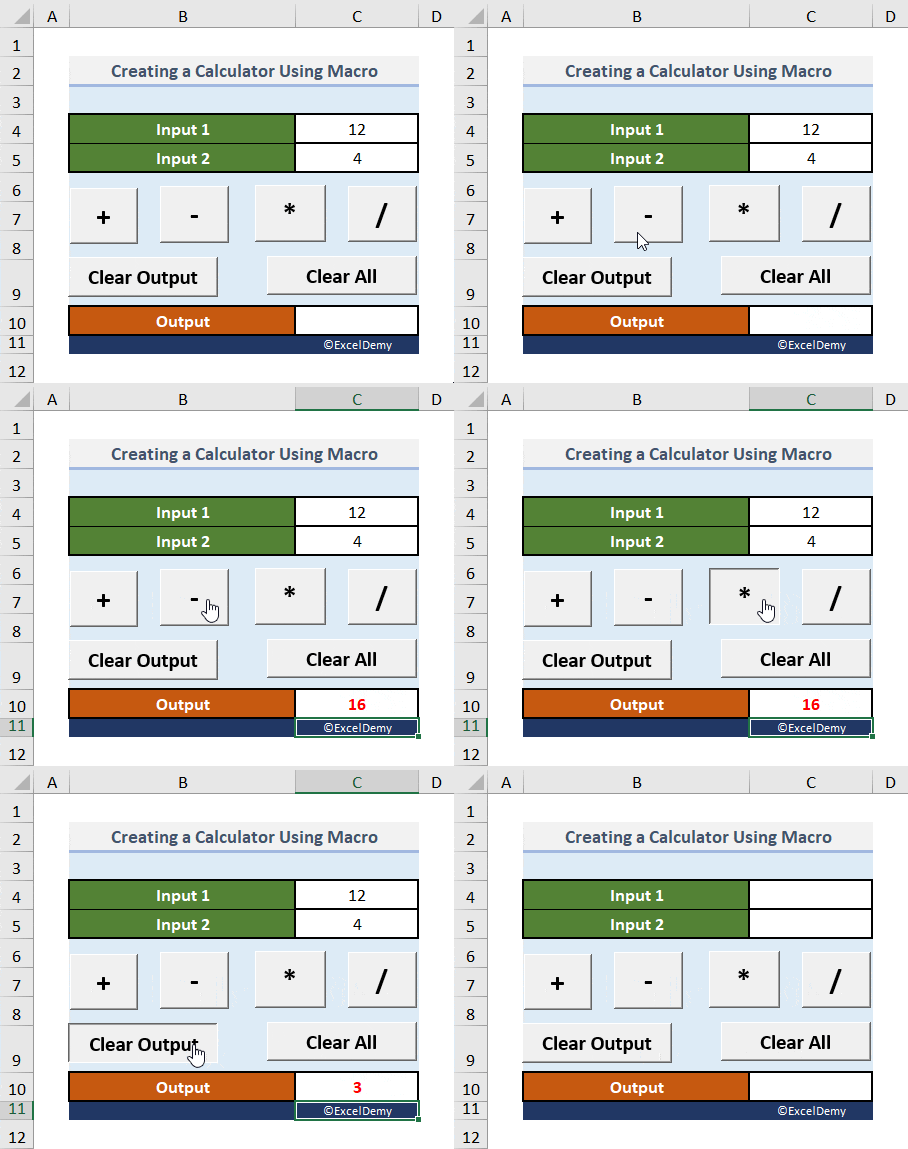
So, without further delay, let’s explore the method step by step. Let’s start!!
Here, we have used the Microsoft Excel 365 version; you may use any other version according to your convenience.
Step 01: Record Macro
In our first step, we’ll record the necessary macros to create the calculator in Excel. It’s a fascinating and entertaining technique for new ones. It’s simple and easy; just follow along.
📌 Steps:
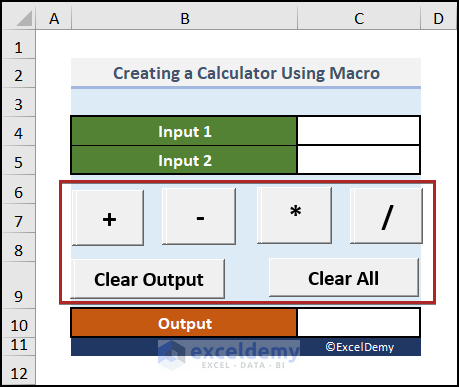
- At the very beginning, create a basic outline like the following image. We constructed two Input cells in cells C4 and C5. On the other hand, you can see an Output cell in cell C10.

- Now, give some dummy values in cells C4 and C5.
- Following this, go to the Developer tab. If the Developer tab isn’t available on the ribbon, go through the article, How to show Developer Tab in Excel on our website to get it done.
- Then, click on Record Macro on the Code group of commands.

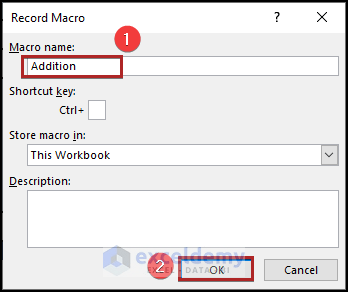
Immediately, the Record Macro dialog box will appear before us.
- In the Macro name box, write down Addition.
- After that, click OK.
Now, Excel will record whatever we do in the worksheet.
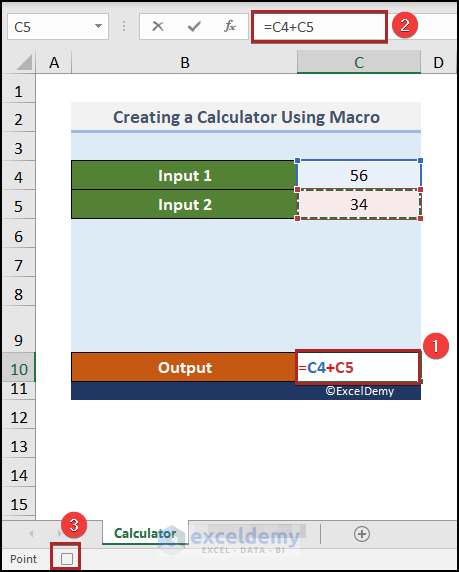
- So, select cell C10 and enter the following formula in that cell.
=C4+C5
- After that, press the ENTER key.
- Then, click on the Stop button on the left-bottom corner of the display to stop recording the macro.
So, it’s a simple macro to do the addition operation.
Step 02: Copy Code for Various Operations
We can see the VBA code of this macro easily. So, let’s see it in action.
📌 Steps:
- Again, proceed to the Developer tab.
- Afterward, click on Macros on the Code group.
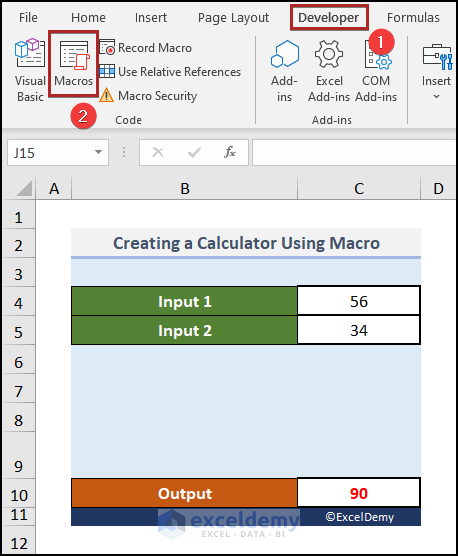
Instantly, the Macro dialog box will pop up.
Here, we can see the Addition macro, which we created just a little bit ago.
- Therefore, select this macro.
- Following this, click on the Edit button.
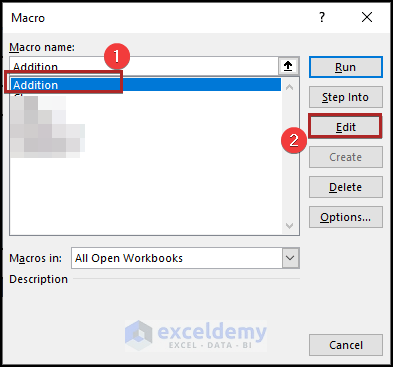
Right away, it’ll take us to the Microsoft Visual Basic for Applications window. We can see the relevant codes here.
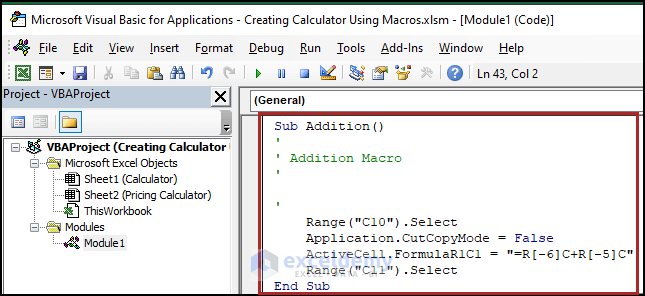
So, it’s the code for the addition operation. Now, we’ll copy this sub-procedure to create macros for other operations like subtraction, multiplication, and division.
- Momentarily, copy the code and paste it down thrice.
- Just change the operator from (+) to (–) for subtraction, to (*) for multiplication, and to (/) for division.
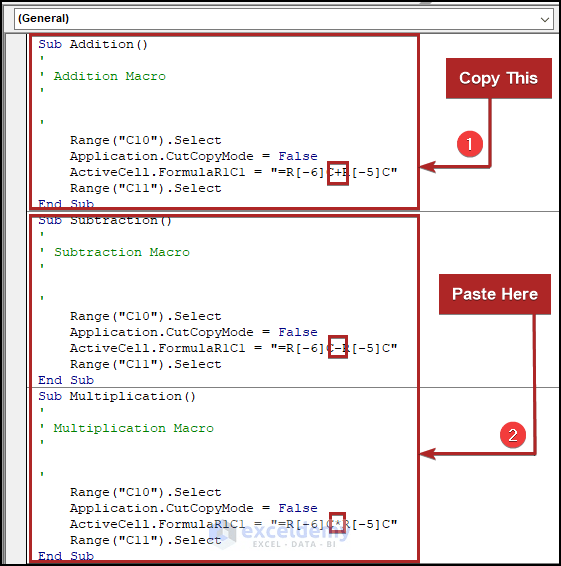
Presently, we opt to create 2 dedicated macros for deleting contents from the cells.
- Similarly, bring the Record Macro dialog box.
- Then, write down Clear_Output as the Macro name.
- Also, click OK.
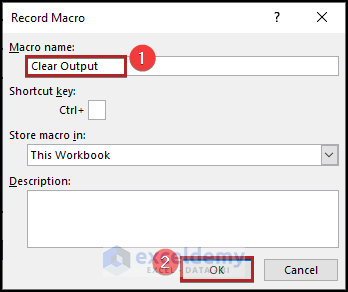
Now, the macro is recording. Do the following steps.
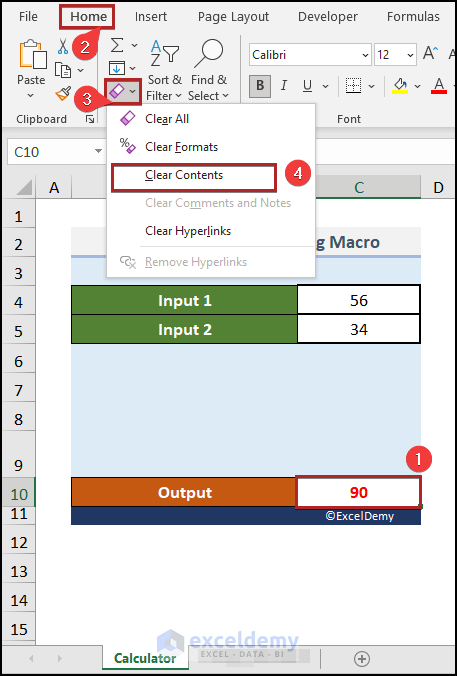
- At first, select cell C10.
- Then, navigate to the Home tab.
- After that, click on the Clear drop-down icon.
- From the drop-down list, select Clear Contents.
- Later, tap on the Stop button on the Status Bar.
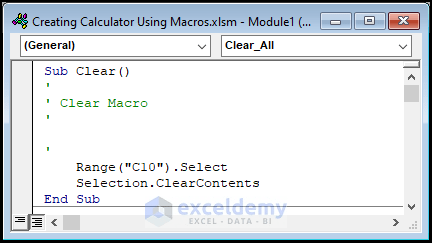
Equivalently, you can see the VBA code for this macro.
- In addition, we created a different macro to Clear_All.
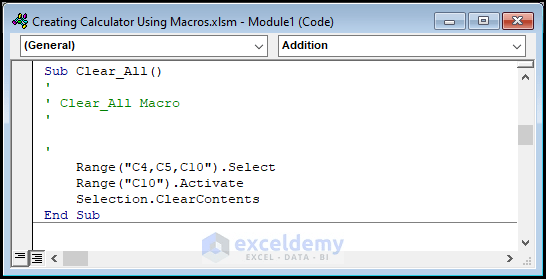
With this macro, we can delete the contents in cells C4, C5, and C10.
Step 03: Insert Button from Form Controls
In this step, we’ll insert some buttons to control these macros. So, without further delay, let’s dive in!
📌 Steps:
- First of all, advance to the Developer tab.
- Secondly, click on the Insert drop-down icon.
- Thirdly, choose Button (Form Control) from the available options.
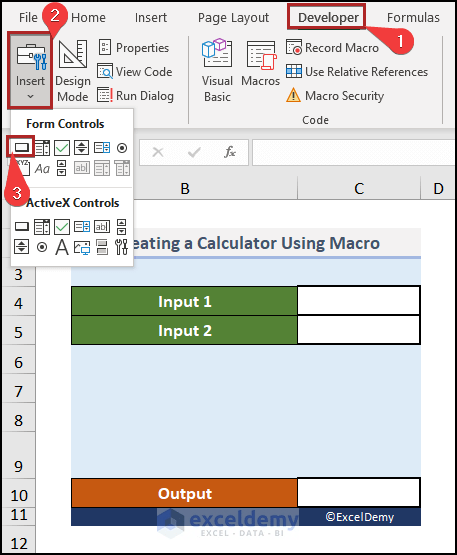
- After that, place a button like an image below.
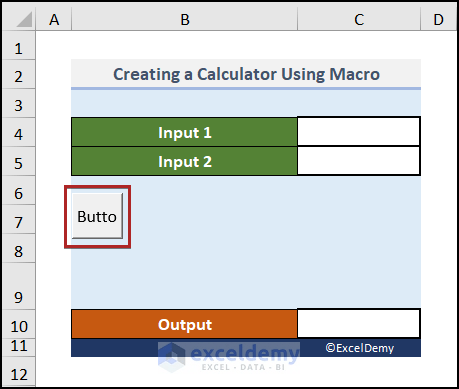
- At this moment, right-click on the button.
- From the context menu, click on the Edit Text option.
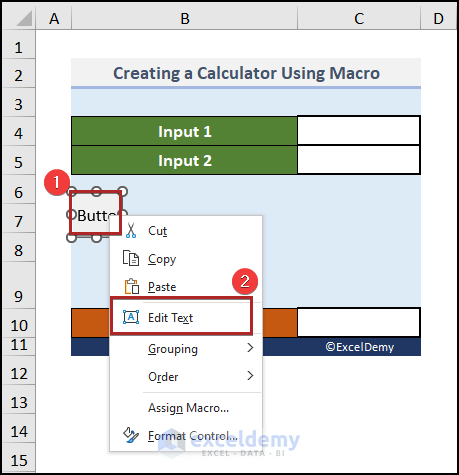
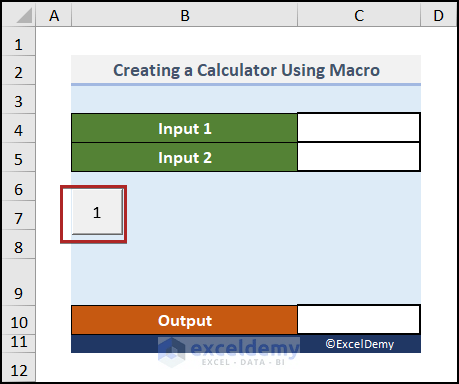
That’s how you could change the button caption. We created this button for Addition.
Step 04: Assign Macro to Button
This button is now useless because we didn’t assign a macro. So, clicking on it will give us no result. So, see the steps below to learn how to assign a macro to the button.
📌 Steps:
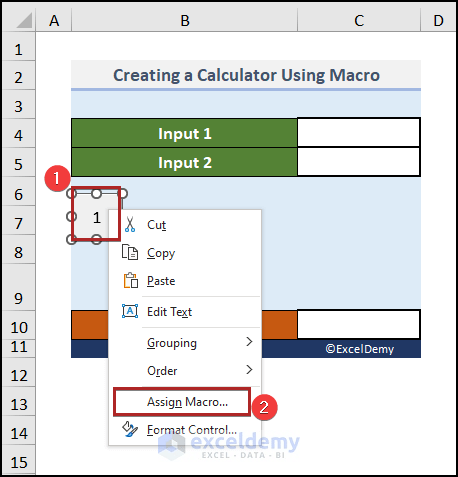
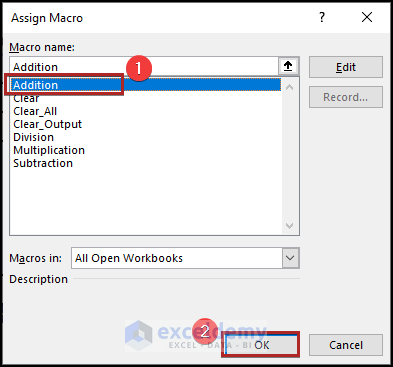
Immediately, the Assign Macro dialog box appears.
- Here, select Addition in the Macro name box.
- As always, click OK.
- Similarly, create all the necessary buttons like before.
- Moreover, follow the previous steps to assign macros to their respective buttons.
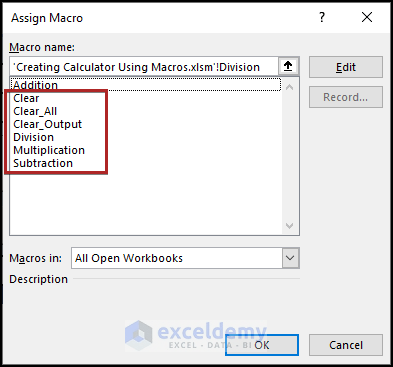
All the work is done. Now, let’s check whether it is working or not.
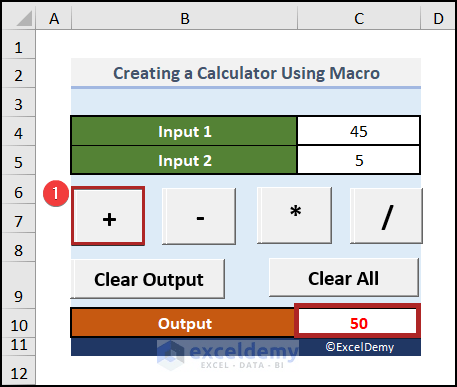
- Initially, give two inputs in cells C4 and C5.
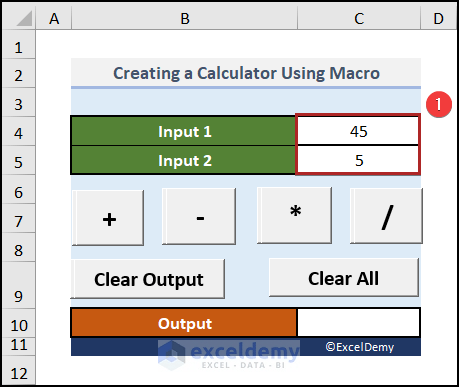
- Then, click on the + (plus) button and you’ll get the output in cell C10.
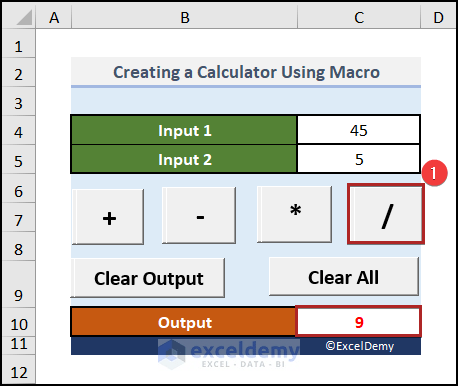
- After that, click on the / (division) button and see the result in cell C10.
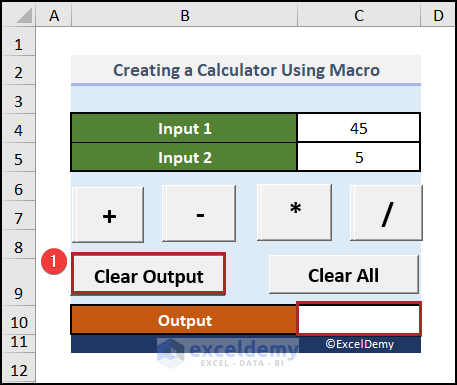
To clear just the output in cell C10, tap on the Clear Output button.
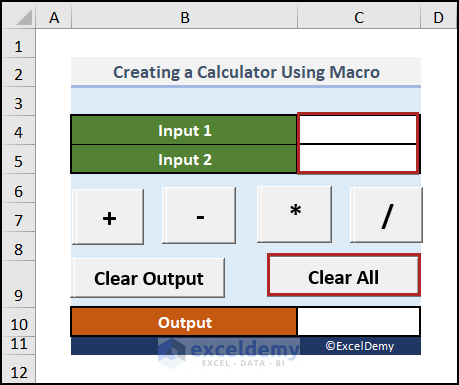
Tapping on the Clear All button will delete the inputs and outputs.
Read More: How to Create Toggle Button on Excel VBA UserForm
How to Create a Pricing Calculator in Excel
Here, we’ll show how you can calculate the selling price of a product based on its cost and %markup. If we have the Cost and our expected %Markup, then the formula for calculating the Selling Price would be like that:
Selling Price = Cost * (1 + %Markup)
We’ll use this formula to create the pricing calculator in Excel. So, let’s explore this method step by step.
📌 Steps:
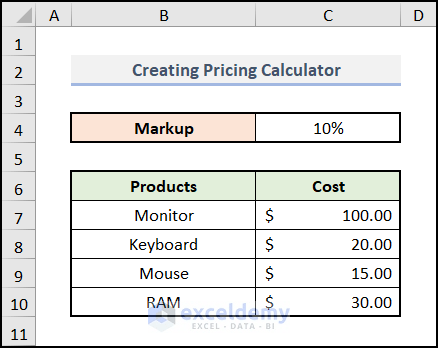
In the following image, we can see a list of some Products and their corresponding production Costs in columns B and C. Also, we have the expected Markup percentage in cell C4, which is 10%.
- At first, create a new column with the heading Selling Price under Column D.
- Then, write down the following formula in cell D7.
=C7*(1+$D$4)
- As usual, press ENTER.
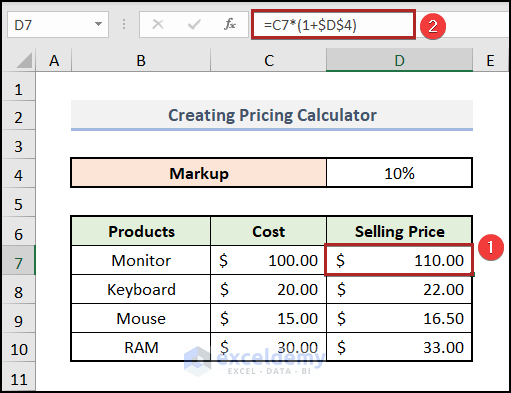
You can use this calculator in your business also. Give your expected Markup percentage in cell D4 and your Costs in Column C. This calculator will calculate others.
Practice Section
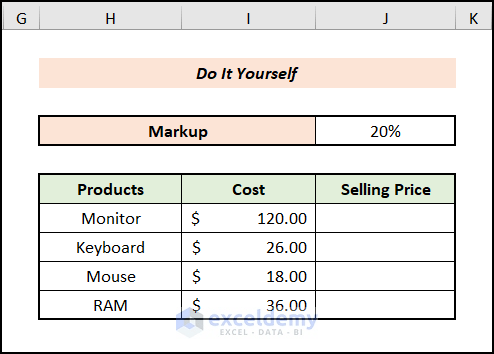
For doing practice by yourself, we have provided a Practice section like the one below in each sheet on the right side. Please do it by yourself.
You may download the following Excel workbook for better understanding and practice.
Creating Calculator Using Macros.xlsm
Conclusion
This article explains how to create a calculator using macros in Excel in a simple and concise manner. Don’t forget to download the Practice file. Thank you for reading this article. We hope this was helpful. Please let us know in the comment section if you have any queries or suggestions.
Related Articles
- How to Use Excel VBA Userform
- Excel VBA: Create a Progress Bar While Macro Is Running
- How to Create Cascading Combo Boxes in Excel VBA User Form